The ESP8266 is adopted widely by professionals as well as hobbyists due to it's durability, compactness and power saving hardware in the filed of IoT. The fresh chip working on ATcommands which is difficult to program and needs another MCU to handle the operations of ESP8266 chip.
Fortunately, You can program the chip by Arduino IDE, you can load the firmware in the ESP and run all the operation without help of any master MCU. For that you should have to follow some steps to install the core files in the IDE, which is shown below.
There are several methods to install the core files, but here I am only showing you installation using the help of board manager. This method is useful for end users and non technical people.
Prerequisites
- You need Arduino IDE software installed in your system. For download, visit the official Arduino website.
- Active internet connection.
Installation Steps
- Start the Arduino IDE.
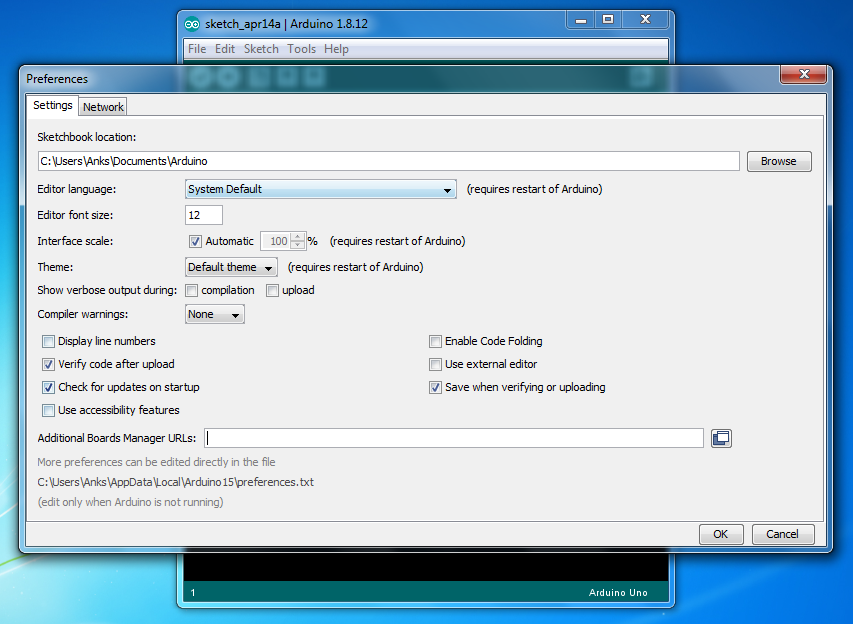
- Go to File > Preferences . It will open Preferences window.

- Enter following URL into Additional Board Manager URLs field. You can add multiple URLs by using commas. Here, we have two URLs one for ESP8266 and another is for ESP32. "https://dl.espressif.com/dl/package_esp32_index.json,http://arduino.esp8266.com/stable/package_esp8266com_index.json"

- Go to Tools > Board: > Boards Manager...

- In the boards manager window scroll down and find ESP8266 and ESP32 platform. Click on drop-down, select the version you need and then click on install button. If you do not want to install the ESP32 then left it as it is.


Finalizing
- Restart the Arduino IDE
- Select your ESP8266 configuration in Board option in tools menu.
Video Tutorial
Enjoy the Programming !!!

0 comments: